Showing posts with label cookies. Show all posts

Friday, February 1, 2013

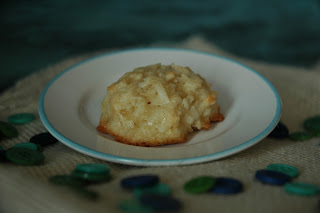
Homemade Valentines/Coconut Macaroons

The coconut macaroon is a very versatile cookie. It can be eaten warm or cold, by itself or drizzled in chocolate, and served at a tea party or a ball game. As such, they make the perfect homemade valentines for friends and neighbors. If you have a lot of people on your list, then you may want to double or triple this recipe. It makes about 24 cookies but they are small. 

We don't do a lot with coconut around here. Those of us that like shrimp prefer it naked rather than clothed in coconut and fried. (I'm okay with it - especially with an apricot glaze. But I can't seem to convince any of the kidletts.) So I figured that a cookie was a good place to introduce the unique texture of coconut flakes. 


For us, this wasn't about learning a new skill it was about trying a new ingredient. I let the little ones feel the flakes in their hands. Smell it - if they wanted. The older three tasted it raw but the 4-year-old refused. Once they realized it wouldn't kill them, they were much more open to the idea of a cookie made entirely out of coconut. (Love that I have to convince them I'm not trying to feed them poison.) 

 Coconut Macaroons 
Makes about 24 cookies
Click here to print this recipe.


Ingredients:
1 1/2 cups flaked coconut
1/3 cup sugar
2 tablespoons flour
1/8 teaspoon salt
2 egg whites
1 teaspoon vanilla
1/2 teaspoon rum extract

Directions:
1. Preheat the oven to 325 degrees.
2. Combine coconut, sugar, flour salt in a small bowl.
3. Add the egg whites, vanilla, and rum extract. 
4. Stir until well combined. 
5. Use a teaspoon to measure out a cookie ball and drop the ball onto a greased cookie sheet. 
6. Bake for 18-20 minutes or until golden brown. 

Friday, December 21, 2012

Naughty and Nice/Santa's Favorite Cookie


We'd been dithering over what cookies to leave for Santa for the last month so I had to google "Santa's favorite cookie" to see what Santa liked the best. I had been leaning toward making the traditional chocolate chip cookie to leave for Ol' Saint Nick. I mean, in every Christmas movie and children's book we've ever read, the cookie offering doesn't vary much. I found a great post written by Michael Jensen on his own Google search for Santa's fav's. He was a little more thorough in his search than I was and, because he believes in Santa, I think I can trust his research. Santa's favorite comes down to two cookie options: chocolate chip or Oreo.

DSC_3008We talked about possibly combining the two favorites and making Bookies. You can find my recipe for Extreme Bookies here.

One of the kids was dead set against this because it wasn't a "real" cookie. This recipe makes a 9 x 13 pan full of deliciousness. I wasn't sure Santa could eat that much in one trip. I mean, I bet he could if he put his heart into it, but he's busy on Christmas Eve and it wouldn't be polite to expect so much of him.

So we went back to the mixing bowl. One child suggested making a dark chocolate chip cookie. The dark chocolate from the Oreo and the chocolate chips from the chocolate chip cookies. They all liked this idea and I set out to find or create an Oreo inspired chocolate chip cookie. Once we had the base cookie down, which is darn good on its own, we made a frosting reminiscent of an Oreo cookie's filling. Then we dusted them with shaved chocolate and Ho Ho Ho we have a winner. 

My eight-yr-old asked why we add salt to sweet things like cookies and frosting. That was a wonderful question! It's kind of like Santa's Naughty and Nice list. No one is perfect (we all have a little naughty in us) and each sweet treat needs a little salt. Naughty adds depth to our lives as we learn from our mistakes, enriches our character as we overcome them, and keeps us humble as we recognize our faults. 

The salt does the same thing to the cookies. The tiniest bit of salt will balance out the sweet of the sugar, brown sugar or powdered sugar. It allows us to enjoy the sweet in the cookie by recognizing the difference between the two.  The trick is to create a balance that keeps you on the nice list!

And, so that you too can surprise Santa with a delicious cookie on Christmas Eve, and possibly up the number of gifts under the tree (I'm not promisin' just sayin') here is the recipe for:


Click here to print.
Santa's Favorite Cookie
makes 24 cookies 

Ingredients:

1 cup butter at room temperature
3/4 cup sugar
3/4 cup brown sugar
1 teaspoon vanilla
2 eggs
2 1/4 cups flour
1/3 cup dark cocoa powder
1/2 teaspoon salt
1 package semisweet chocolate chips
1 semisweet chocolate bar for shavings

For frosting:
1 cup marshmallow creme
1/4 cup shortening
3 tablespoons milk
3 cups powdered sugar
a pinch of salt

Directions:

1. Preheat the oven to 375 degrees.
2. In a large mixing bowl cream together the butter, sugar and brown sugar with a hand mixer.
3. Add the eggs and vanilla and beat well.
4. Add the flour, cocoa, and salt. Mix until all the dough is a dark chocolate color.
5. Add the chocolate chips and stir in by hand.
6. Drop by rounded tablespoonfuls onto an ungreased cookie sheet. 
7. Bake for 8-10 minutes or until set. 
8. Transfer to a wire rack and allow to cool.
9. In a small bowl, mix together the marshmallow creme, shortening, milk, powdered sugar and salt until creamy. 
10. Use the back of a spoon to spread some frosting on a cookie.
11. Use a cheese grater to shred the dark chocolate bar over the frosted cookie.
12. Set on a fancy plate and serve to Santa with a cup of milk.

Friday, December 7, 2012

Cracking Walnuts / White Chocolate, Cranberry, Walnut Cookies

Man, I really need to work on naming my cookies shorter names. 
From now on I will call them Bud Cookies.
Here's why...
We had a sweet neighbor, Bud, who would generously allow our family to gather walnuts from under his walnut tree. We'd get a huge bag full that would last almost a whole year! See this bag? That's about 1/4 of what we started out with. (Not sure why the Chex were on the table at this point in the afternoon... You ever have random things pop up in your life?) Anyway, Bud was recently moved to a care facility and our neighborhood truly misses him. In his honor, we will call these Bud Cookies.


So we don't have a real nut cracker. I can't remember owning one the whole 14 years we've been married. Aha! There's more than one way to crack a nut.


I gave each of the kids a kitchen towel and a heavy spoon or ice cream scooper. They put the nuts in the towel and then hit them really hard. Oh my gosh! You would not believe how much fun they had. Seriously, I knew kids liked to make noise and break things but they were at it for a good hour before they even realized they were working.


Tip #1 Make sure kids don't have to share the hammer/ice cream scoop or towel. If they have to wait around they will get bored. Even my 4-year-old got her own set. I was shocked at the pure joy on her little face as she demolished walnuts.

Tip #2 Do not do this on your kitchen table if you care about the finish. There's a LOT of banging going on here and if your table is precious you'll want to have them work at the counter.

Tip #3 Tune out the noise. It sounded like Santa's workshop in here. I think it would have driven Hubby out of the house pretty fast if he'd been home. If you need to, wear ear plugs.

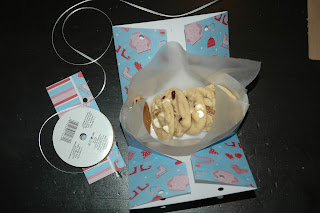
So, when we got done cracking the nuts and baking the cookies, I whipped up these cute little boxes that I found at Cosmo Cricket


They hold six cookies perfectly. I lined them with wax paper before adding the cookies to keep any oils/fats from soiling the boxes. I was giving them away that day but if I was going to store them I would put the cookies in a zip-top bag before putting them in the box.


Here's your change to make a cookie that looks so festive with the red and white. If you wrapped them in green you'd have the perfect neighbor gift. I will be making more to pass out on our annual delivery route. I don't think we'll be making these for Santa. (Hubby said he heard Santa doesn't like nuts. I think it's a vicious rumor and he's probably on the naughty list for even bringing it up!)

Click here to print this recipe.
Bud Cookies
Makes 24 cookies

Ingredients:
1/2 cup butter at room temperature
1/4 cup butter flavored shortening
1/2 cup sugar
1/2 cup brown sugar
2 eggs
1 teaspoon vanilla
1 teaspoon baking soda
1/2 teaspoon salt
2 1/4 cups flour
1 small box vanilla pudding
3/4 cup white chocolate chips
1/2 cup craisins
1/2 cup walnuts

Instructions:

1. Cream together the butter, shortening, sugar and brown sugar.
2. Add the eggs and beat until fluffy.
3. Add vanilla, baking soda, salt, flour and pudding. Mix together until thick dough forms.
4. Add the chips, craisins and nuts and mix them into the dough. You don't have to mix well. If you sprinkle each one over the dough and then barely mix it together you'll get a good lookin' - and tastin'- cookie.
5. Place by rounded tablespoonfuls on an ungreased cookie sheet.
6. Bake in a preheated 350 degree oven for 9-11 minutes.

Friday, November 30, 2012

Melting Chocolate Chips / 3X Chocolate Cookies

We had quite the surprise Thanksgiving morning. We'd just finished cleaning up the Thanksgiving breakfast dishes (turkey sausage, turkey bacon, pumpkin pancakes and all the fixin's) when there was a jolly "Ho Ho Ho" at the door. In came Saint Nick complete with bells and a red sack over his shoulder. 

My kids' eyes about popped out of their head. 
What made it even better was that Santa gave me a huge hug and said, "Good to see you, Chrissy." 
I think Rub was about to have a heart attack. 
As Santa moved on to greet the rest of the family, Rub cupped his hand around his mouth and whispered, "Santa knows your name!"

"Of course he does. I was on the Really Good List."

The kids each got a turn on Santa's lap. 
Here is my cousins' youngest daughter deciding if she likes him or not.

We sang Jingle Bells complete with jingle bells from Santa's sack. 

Then Santa sat down and read the kids a story about a grumpy Santa Clause who has a bad day at work. 


Click here to purchase your own copy.

Are You Grumpy, Santa? by Spiridellis, Gregg; Spiridellis, Evan published by Hyperion Paperback

!!!Spoiler Alert!!!
At the end of the story Santa's grumpy state is turned around by a thoughtful plate of cookies and a note of love and thanks. 


Since we haven't picked the cookies we will be leaving out on Christmas Eve, the kids and I have been testing new recipes. Here's one we particularly liked that is stuffed full of chocolate. Be sure and read all the way through for the bonus tip at the end. We happen to think Santa is a bit of a chocoholic around here. Well, maybe more Mrs. Clause than Santa himself.

This is a fantastic recipe to teach kids how to melt chocolate chips in the microwave. I was working with Roo, who is 4, so she and I talked about textures as we worked. 

"Is it lumpy or smooth?"
"Lumpy."
"Then we need to cook it a little longer."
"Is it lumpy or smooth?"
"Smooth."
"How can you tell?"
"I don't see any bumps."
"Let's put it in the dough."

If I was working with my older kids, I would work on using the defrost setting for the microwave and programming in different cook times. 

Click here to print this recipe.

3X Chocolate Cookies
Makes about 24 cookies

Ingredients:
1/4 cup room temperature butter
1/4 cup butter flavored shortening
1/2 cup granulated sugar
1/2 cup brown sugar
1 egg
1 teaspoon vanilla
1 1/2 cups flour
1/4 cup cocoa powder
1/2 teaspoon baking soda
1/2 teaspoon baking powder
1/2 teaspoon salt
1/2 cup butterscotch chips
1 tablespoon butter
3/4 cup semisweet chocolate chips
3/4 cup white chocolate chips

Directions:

1. Preheat the oven to 350 degrees.
2. In a large mixing bowl, cream together the butter, shortening, sugar and brown sugar.
3. Add the egg and vanilla and beat until fluffy.
4. Add the flour, cocoa, baking soda, baking powder and salt. Mix until combined.
5. Put the butterscotch chips and the butter in a microwave safe bowl. Use the defrost setting to melt the chips and butter for one minute. 
6. Stir the butterscotch chips. If they aren't melted all the way then place them back in the microwave for another 15 seconds. Stir again. Continue cooking them at 15 second intervals until they are smooth.
7. Add the melted chips to the batter and mix well.


8. In a small bowl, mix together the semisweet chips and the white chips.


9. Shape the batter into rounded tablespoons and press the top of them into the chips.

10. Place the cookie dough balls evenly apart on a cookie sheet.

11. Cook for 8-11 minutes.


 What started out as a moment to cool off... 


...quickly became an opportunity for three kids.


BONUS: How do you tell if a chocolate cookie is cooked through? Use a hot pad to lift the pan out of the oven and smack it on the counter. If the cookies fall, they are done. If they stay puffy then they need more time.
Friday, October 26, 2012

Learn to Cream Butter and Sugar with Chocolate Chunk Peanut Butter Pudding Cookies

I have been told that these are the best Peanut Butter Chocolate Chunk Cookies in the world. 


Colkie and I made them for a friend's birthday. When we got there, she hid them away from her kids so she could eat all 12 by herself. I found no fault in this - it was her birthday after all. :-) If you teach your kids how to make them, they can cook you up a batch for your birthday. Trust me, it's worth the effort.

The skill to teach along with these cookies is: to cream. It means to beat butter and sugar together (and sometimes eggs) with a stand mixer or hand mixer. Creaming is different than beating together until combined. Feel free to show your kids the difference.


This is butter and sugar beat together until just combined. See how dark and grainy it looks?


This is the butter and sugar creamed together. By incorporating air, you have lightened the colors and texture. The more air you get into the batter the higher your cookies will sit when baked. That's because the air expands as the cookie cooks. When I was younger, I loved to get a big ol' spoonful of this stuff. I can't imagine doing it now. I guess that's part of how I learned to cream things together. I could feel the difference in my mouth. If you're inclined to let your kids try it go right ahead. Kids are often sensory learners. Just make sure you do it before you add the raw eggs into the mixture.


Chocolate Chunk Peanut Butter Pudding Cookies


For a printable version of this recipe click here.

Makes about 36 cookies


Ingredients:
3/4 cup butter at room temperature
2/3 cup creamy peanut butter
1/2 cup sugar
1/2 cup brown sugar
2 eggs
1 teaspoon vanilla
1 teaspoon baking soda
1/2 teaspoon salt
2 1/4 cups all purpose flour
1 small box white chocolate pudding
1/2 cup chocolate chunks

Instructions:
1. Cream together butter, peanut butter, sugar and brown sugar in a medium sized bowl until light and fluffy.
2. Add the eggs and beat well.
3. Add vanilla, baking soda, salt, flour and pudding. Mix well.
4. Add chocolate chunks.
5. Shape into 1 inch balls and place on an ungreased cookie sheet.
6. Bake at 350 degrees for 10-12 minutes or until set. 


Saturday, October 13, 2012

Teaching Kids to Roll Out Dough with Pumpkin Sugar Cookie Dough

My kids love to use a rolling pin because I let them use it to smash nuts, cookies and gram crackers. Just the other day, I realized my 6 year old didn't know how to use a rolling pin to roll out dough. Gasp! I immediately set out to rectify the situation with a batch of Pumpkin Sugar Cookies. (The recipe is below.)

The first thing I did was get him a chair. This way he was tall enough to apply pressure as he rolled and it didn't feel awkward for him.You could also work at the kitchen table.

Then I showed him how to sprinkle flour on the counter and coat his rolling pin by rolling it over the sprinkled flour.

I pulled the dough out of the fridge and plopped it in the middle of his work space. (His eyes just lit up and he said, "It smells good." Uhhhh, yeah it did!)

He was just about to smack the pin on the edge of the dough and go to town when I gently put my hands over his. I told him to, "Start in the middle and go right. Then go back to the middle and go left. Then start in the middle and go up. Then start in the middle and go down." All the while I guided him as we made the first pass in each direction. He didn't get upset at me for showing him, but I have a kid who would. With that child, I warn him that I'm going to show him and then he'll get a chance to try it on his own. Rub had to do the route twice before we got the 1/4 inch thickness we were looking for.

After we cut out the cookies and got the first batch in the oven, I let him flour the counter top and rolling pin, plopped the second half of the dough in front of him and let him show me how it's done.

He started in the middle and went right. Then from the middle to the left.


Then from the middle to the top and the middle to the bottom.
He's a natural!


Your kid can learn this simple baking task in a matter of minutes. Why not whip up some Pumpkin Sugar Cookie dough together and get it chillin'? Don't forget to leave a comment and let me know how your lesson  with a rolling pin went. Thanks for stopping by!


Click here for a printable version of this recipe.


Pumpkin Sugar Cookies 
Makes 24-30 cookies

Ingredients:
1/2 cup butter, softened
1 1/2 cups sugar
2 eggs
1 teaspoon vanilla
1/2 teaspoon baking soda
1/2 teaspoon baking powder
1/2 teaspoon salt
1 cup pumpkin
2 teaspoons cinnamon
1/2 teaspoon all spice
1/2 teaspoon nutmeg
1/2 cup sour cream
5 cups flour

Directions:

1.  Cream together the butter and sugar.
2. Add the eggs and the vanilla, beat well.
3. Add the baking soda, baking powder, pumpkin, cinnamon, all spice, nutmeg and sour cream. Beat until smooth.
4. Add the flour one cup at a time until the dough is thick and smooth. It will be sticky but it should not be runny.
5. Divide the dough into two equal portions. Wrap them in saran wrap and chill in the fridge overnight. This is an important step as it allows the flavors to mature and the dough to firm up for rolling.
6. Preheat the oven to 425 degrees.
7. Lightly dust the counter with flour and coat your rolling pin. Leave one half the dough in the fridge while you work with the other half. Roll the dough to a 1/4 inch thick rectangle. Cut out with cookie cutters. Place cookie dough cut outs on cookie sheets.
8. Bake for 10-15 minutes or until cookies are cooked through. If you rolled your dough out thicker, it will take longer for the cookies to cook.
9. remove cookies form cookie sheet to wire racks to cool.
10. Once cool, frost with cream cheese/cinnamon frosting and decorate.